
Wax Burnout Furnace
This all started with the need to be able to burn out wax investment moulds, so casting using the lost wax method where a wax model is made that is an exact representation of what is required is embedded in a temperature resistant plaster where it is heated to several hundred degrees over a relatively long period where the wax is melted out and any residues left behind are vapourised leaving a cavity that molten metal can then be poured into where it solidifies, once released from the plaster mold a very high resolution copy in metal of the original wax model is produced.
The 'burnout' furnace is the device used to remove the wax.
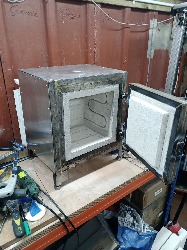
This has been a lengthy build but has resulted in a functional furnace that appears to work well.
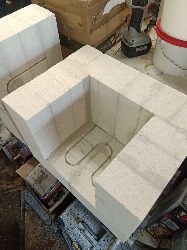
 The build started with constructing the main body forms for the furnace using high temp refractory insulation bricks, these are like an aerated brick but capable of withstanding 1200degC, the two sides were first constructed and the electrical element channels cut, the top and bottom and back were then attached , it was at this point I decided to trim the external size of the furnace, this was done with the knowledge that it would make the furnace less efficient, but space is at a premium in my workshop so a compromise was made.
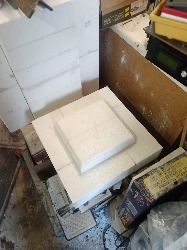
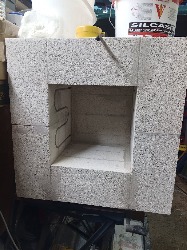
So these pictures show the actual build with the ceramic refractory.
Once the main body was assembled it was trimmed down using a normal wood saw to cut to the required dimensions.
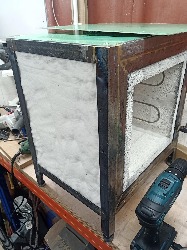
Metal framing was then built to hold and support the ceramic form, 30mm of backup ceramic fibre insulation was then installed before the whole was then clad with an aluminium skin.
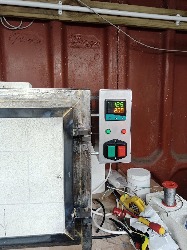 The control system is a commercial controller designed for this use, and was probably the single most expensive element of the whole build.
In use the exterior of the furnace can reach 120degC but considering that the inside is up at 1000degC I don't think that is too bad.
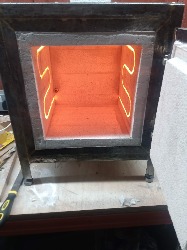
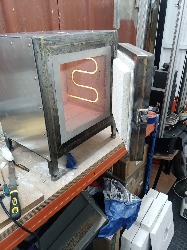
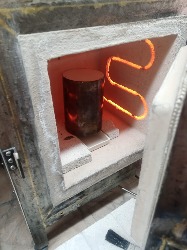 These images show the first test firing of the heating elements there are two each rated at 1Kw, the hardest/most difficult thing to achieve was the termination of the (FeCrAl) elements, I tried using screw connections but because of the heat these didn't last very long at all, finally I came up with the idea of using a 3.5" length of 304 stainless 1/8" diameter rod, where a short length at one end is folded over under red heat and then crushed in a vice with the element wire trapped, this has proved to work very well and as the stainless steel is a relatively poor conductor of heat it doesn't transfer too much heat to the electrics at the back of the furnace. As of yet I haven't had one of these connections fail.
The inside of the furnace has been coated with ITC 100 HT from ITC Coatings an IR reflective coating which also serves to seal the porous nature of the ceramic fire bricks and provide a more robust surface. With use this has turned a fetching shade of light pink. The only real issue is cooling the furnace for the cooldown and stabilisation at the casting temperature, it is often necessary to open the furnace door to allow quicker cooling, I have an air feed into the furnace base, to allow oxygen in so that proper burn out can be achieved.